Ever since Tiny Capital bought a majority stake in AeroPress back in October, 2021, a clear goal of theirs has been to expand the product lineup.
This has led to four new products joining the original Aeropress and the AeroPress Go models (the Go was the last product Alan Adler, the founder of AeroPress, was fully involved in). Three of those products are now out (the AeroPress Flow Control Cap, the AeroPress XL, and the subject of this snapshot review, the AeroPress Clear) and the fourth is still in the works: the AeroPress Premium.
The AeroPress Clear is very similar to the original AeroPress except in one way: it uses a clear type of plastic (actually a copolyester), called Tritan, manufactured by the Eastman company.
The AeroPress Clear is $10-20 more than the original AeroPress ($50 on Amazon, instead of the $40 (sometimes $32 or less) for the original AeroPress) and comes with less stuff than the AeroPress used to ship with, some 10 years ago. We’ll get into that a bit. The Clear is also made in the USA, just like the original AeroPress always was.
With that intro out of the way, let’s get into the review and ratings for the AeroPress Clear!
This review is a bit different because we’ve documented and experimented with the AeroPress on CoffeeGeek for 2 decades now, and at the end of the day, this Clear model works just like any of the others. I did actually run some minor temperature tests (measuring declining temperatures) to see if the Clear Tritan model worked with temperatures better, worse, or the same as the standard AeroPress (results? Pretty much identical).
This is not the first clear AeroPress. It’s not even the first clear AeroPress made from copolyester. The original AeroPress, from 2005 through July, 2009 was made from a clear (with a bluish tinge) polycarbonate material that contained BPA. In August 2009, AeroPress replaced the polycarbonate with a clear copolyester material that was BPA-free. It only lasted a year. The smoke grey tint copolyester AeroPress debuted in September, 2010. Copolyester materials have been used since, though in different iterations, opacity, and outside branding, since.
This is, however, the first “clear” AeroPress since 2010, and it’s made from a tougher, and much more food-safe-tested copolyester this time around. It uses a product called Tritan, manufactured by the Eastman company in the USA. It is extremely durable, very dishwasher safe, and impact resistant. Eastman also pushes its food safety attributes heavily.
The AeroPress Clear box is a bit shorter than I remember the AeroPress box being. That’s because for several years now, the company no longer includes the big six sided funnel or the filter holding stand, and only includes 100 paper filters to get you started.
Open the six sided box up, and inside you find the AeroPress Clear (made up of the brewing chamber, the plunger piston with its attached rubber plunger seal), the filter cap, AeroPress’s unique paddle stirrer, a coffee scoop and 100 filters.
There are no plastic bags around the AeroPress, making it mostly environmentally friendly packaging. The 100 paper filters are wrapped in plastic, which I guess is unavoidable (you don’t want any possible moisture damage during travel).
AeroPress could go even more enviro-friendly by going with a brown outer box, no coating, no colours used, and enviro-friendly graphics printing. Then they’d be top of the class.
The AeroPress Clear itself has a bit of a sparkle to it. Much more so than the original blue tinged polycarbonate models (I never had the pleasure of using the 2010 era clear copolyester unit). Supposedly, the Tritan plastic used is more durable that other copolyesters, and Eastman claims this plastic is “extremely dishwasher safe”. After about 50 brews through the device, and about a dozen trips through the dishwasher, our test brewer still looks brand new.
The lettering and indicator numbers on the AeroPress Clear are white, and stand off visually quite well when brewing coffee sits inside the piston chamber.
AeroPress Variations
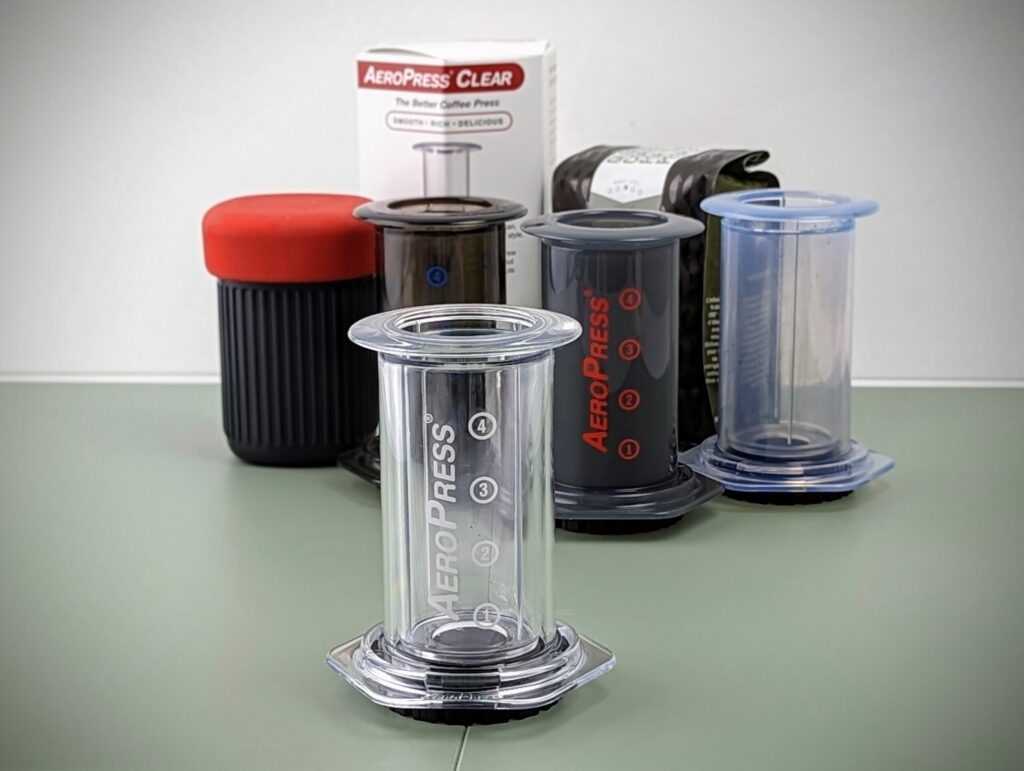
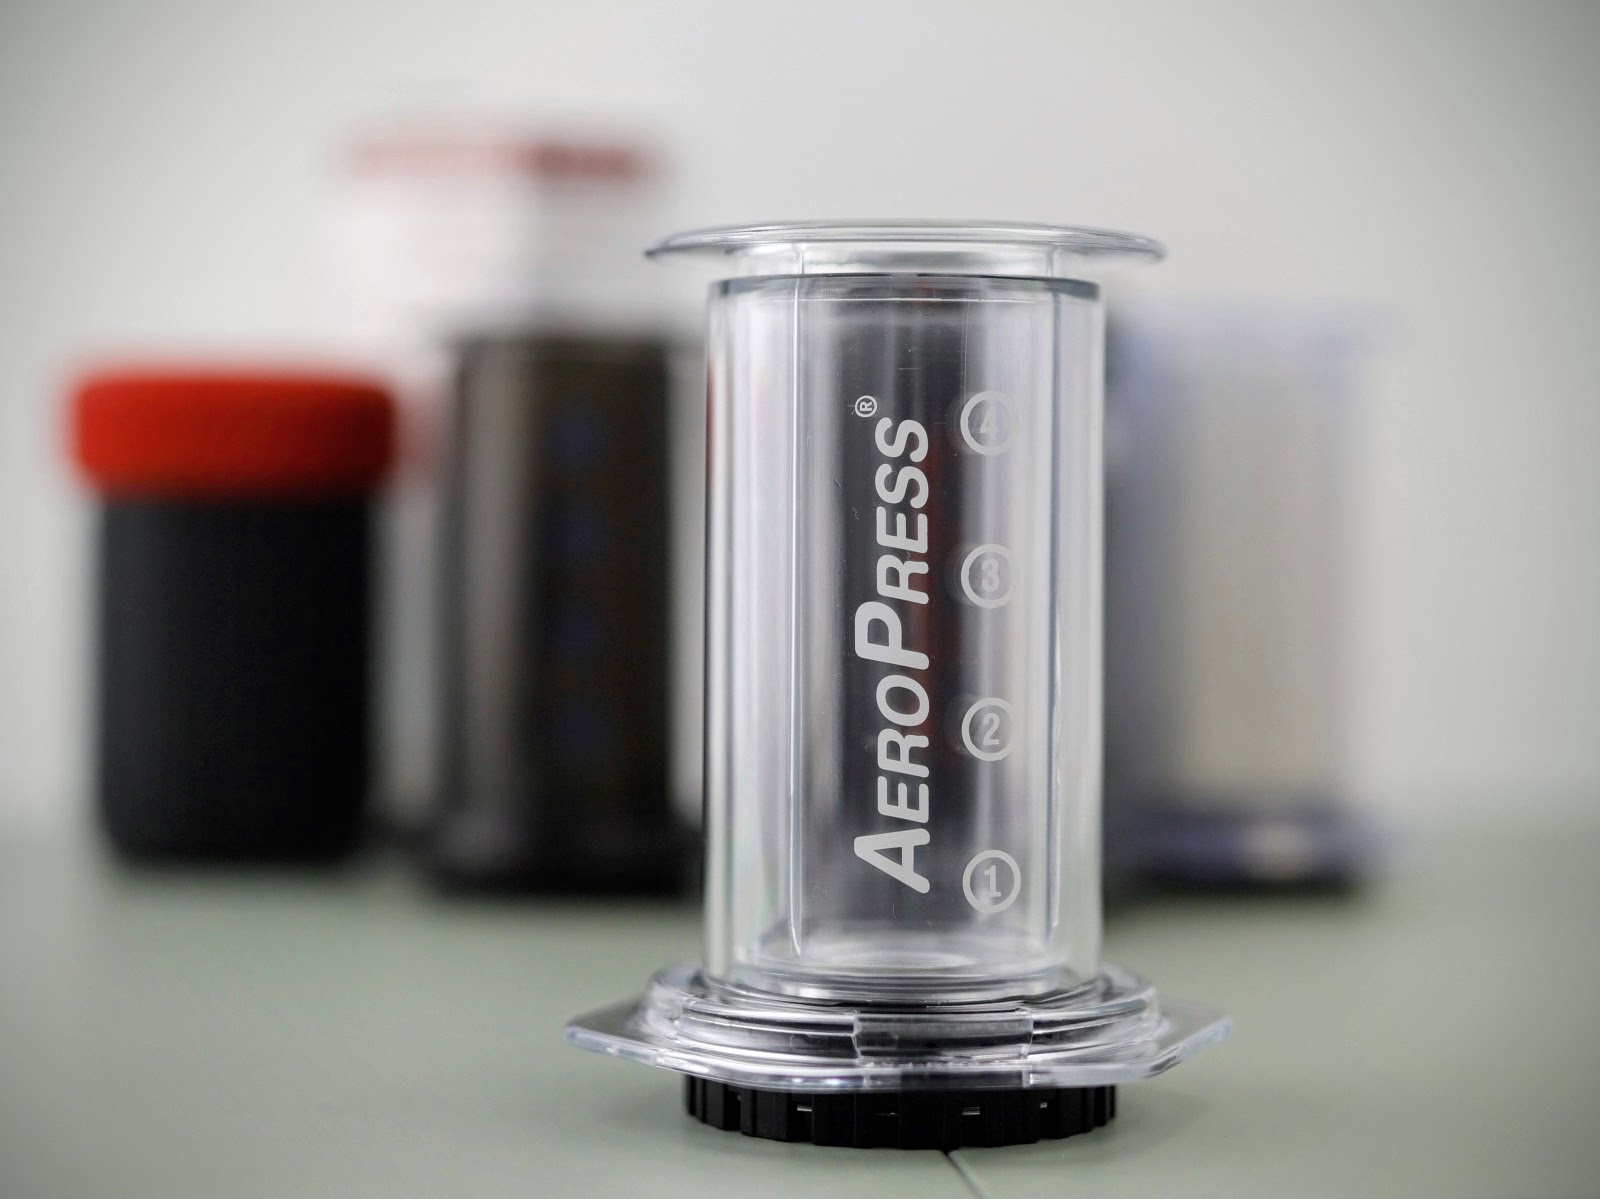
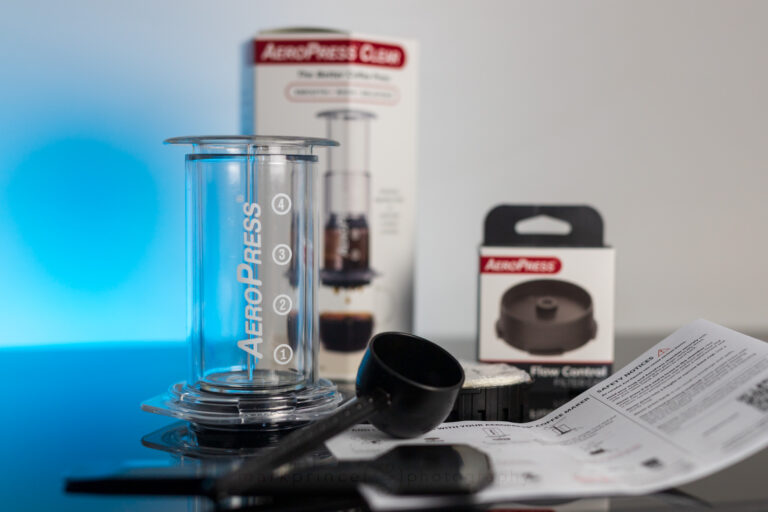
The current AeroPress Clear, photographed with some older versions of the AeroPress, including (left to right) AeroPress Go, Aeropress 2011 model, Aeropress 2022 model, and an AeroPress Prototype.
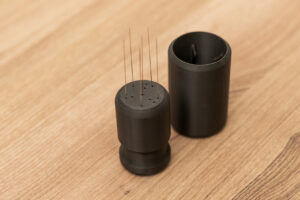
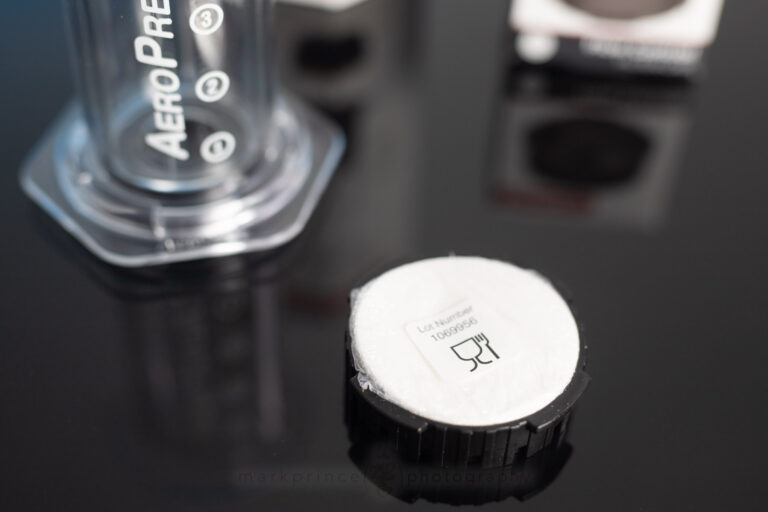
Weight’s an interesting point, especially if you’re a backpacker obsessed with the gram size of everything you pack. The AeroPress Clear is 233g (8.2oz) with the filter cap in place. This makes it the heaviest standard AeroPress so far. The current smoke grey-brown AeroPress is a svelte 179.5g (6.33oz) and for comparison’s sake, the prototype AeroPress from 2005 is 225g (made of polycarbonate).
Speaking of the filter cap: Aeropress changed the design of it from a grid pattern of holes, to a radial one. I’m curious as to why, though I’m sure it still works fine. One thing to note – there’s no central hole in the new cap design; perhaps this is to encourage a different flow pattern when using the device as a flow through. Because I’m geeky, I counted all the holes:
The new radial pattern filter cap has 74 holes, arranged in 4 rings. The outer two rings both have 24 holes; then 18, then 8 for the inner most ring. The previous filter cap Aeropress between 2005 and 2022 has 97 holes, arranged in a grid pattern of equal distance.
Filter Cap Change
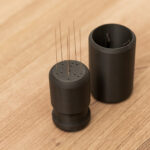
Radial design, new, on the left. Original (until 2022) cap, on the right.
The size, dimensions, and pattern of the AeroPress Clear is identical to older AeroPress models (except the AeroPress Go). This means any accessories, from slot in manual grinders, to 3rd party filter caps, should fit the AeroPress Clear.
Accessories Play Nice
All existing accessories designed for the original AeroPress work just fine in the Clear model. Including the capable and beautiful Knock AerGrind, which slots right into the AeroPress plunger.
If you enjoy and learn from this resource, please consider making a one time or recurring donation to help support our work and fund purchases for future reviews.
To be honest, I’m not going to cover much about the first use because it works just like every other AeroPress. You can brew using the enclosed instructions (flow through brewing that you create a vacuum pause mid way through the brewing process), or the inverted method, which we’ve detailed on CoffeeGeek.
What is cool is that you can actually see the brewing process. See if your coffee needs a stir because unsaturated grinds pile up in the bottom of an inverted brew. See the coffee form its cap of grounds during the bloom phase, then drop the grounds down in a cascade after you do a quick stir. See the head of coffee foam form from freshly roasted, freshly ground coffee. Watch the turbulence created by your gooseneck kettle as you pour from a higher or lower level.
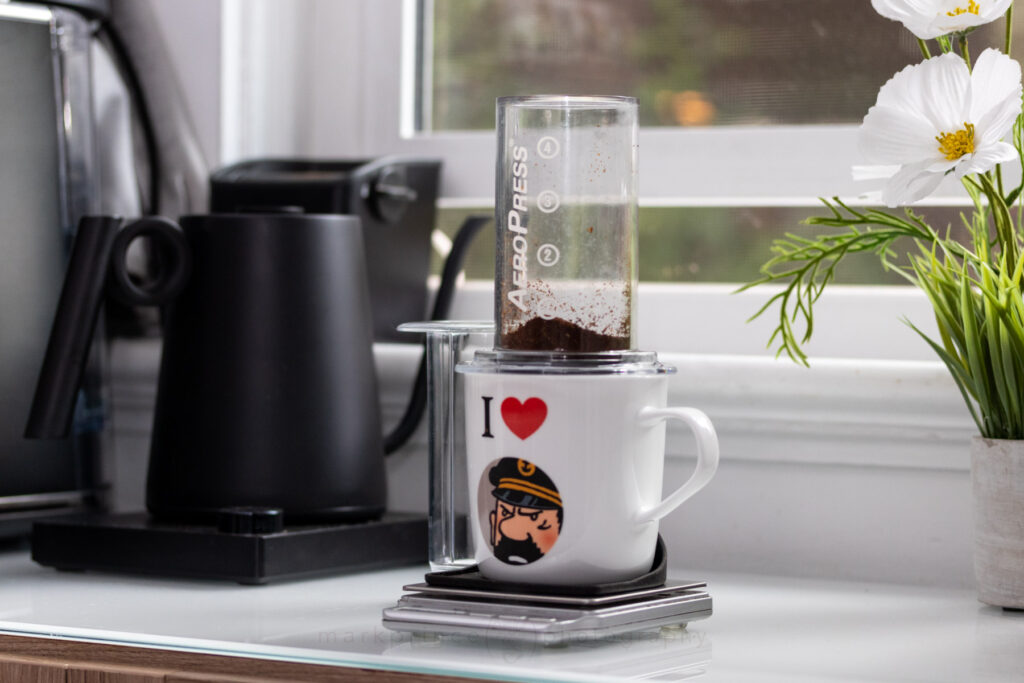
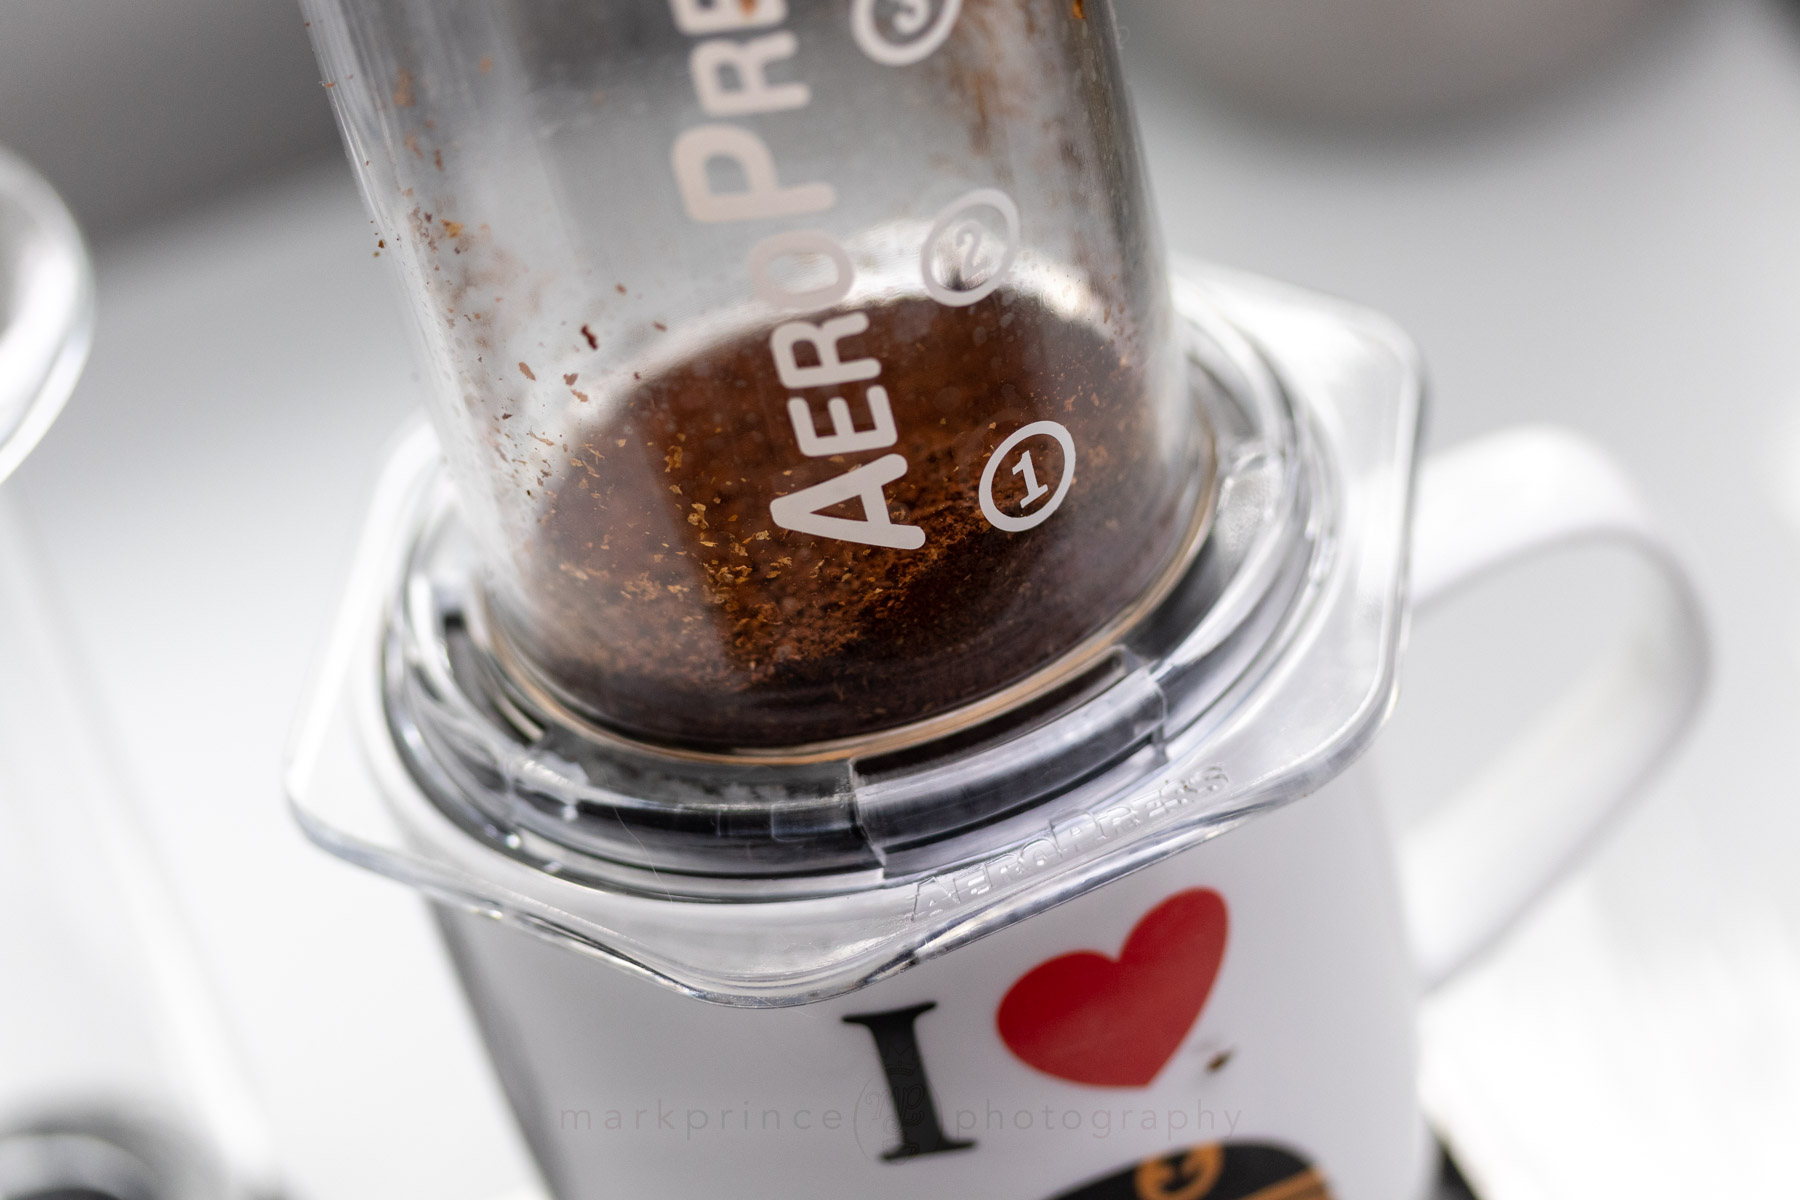
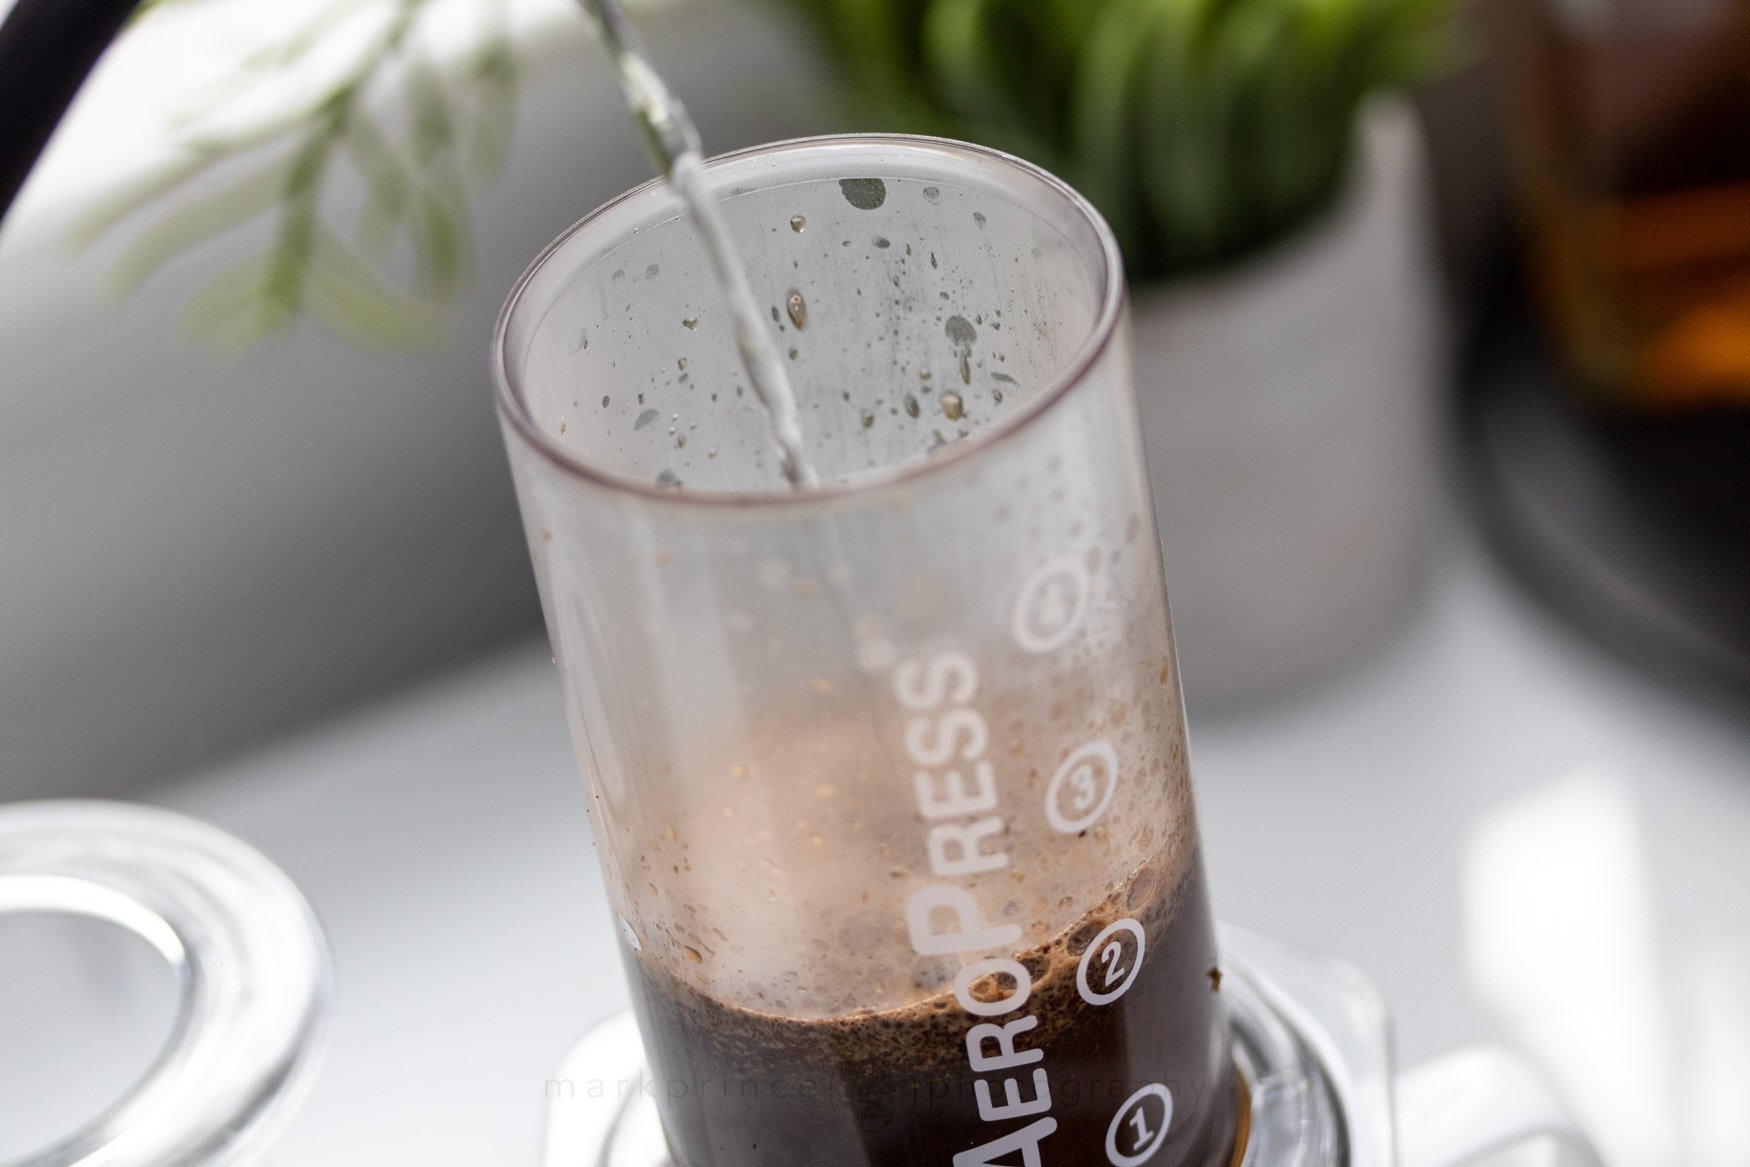
The brew processis crystal clear in the AeroPress Clear. It's even better with a backlight of sorts. Where I brew in the morning, the sun hits the back of the AeroPress, hyper-illuminating everything happening in the coffee slurry.
Indeed, given that the AeroPress has legions of tinkerers, experimenters, and people who want to find better and more inventive ways to use the brewer, this clear model should be a boon for them, because you can once again visually inspect the coffee as it goes through its brewing process. This is probably the number one benefit going forward for the AeroPress Clear.
I ended up putting about 50 brews through the AeroPress Clear before putting pen to paper for this review. I brewed it traditionally. Brewed inverted. I used the AeroPress Flow Control cap. I even used it as a flow through brewing device (no-bypass brewin’, baby!). Other than the clear observation you now have of the active brewing cycle, it’s exactly like every other AeroPress.
I remember when people were in wonder of the Illy Transparent Portafilter (circa 1998). Few saw it in person. Everyone can see the brew process in the AeroPress Clear.
The last time I bought an AeroPress, I bought 10 of them for an AeroPress class I held in Vancouver in 2015. In the box back then, you got the AeroPress (smoke grey tint with beige lettering), the unique Aeropress wide stirring stick, a measuring spoon, 350 filters, a filter holder stand, and a funnel to easily pour coffee into the AeroPress. All for $30USD for a product made in the USA. It was a killer of a deal, and possibly one of the best deals ever, in specialty coffee.
Today, the AeroPress Clear (and the original AeroPress) ship without the funnel. Without the filter holder stand. And with only 100 paper filters, instead of the old 350. For $40 (original) or $50 (clear).
Yeah, you’re getting less, and spending more, but it’s still a fantastic deal.
Think about it. Can you believe the original AeroPress, including the funnel, filter stand and 350 filter papers was $30 retail from the time of its introduction (2005) through 2017 or so without any price increase. Made in the USA too? Adler must have been making under $2 per unit manufactured (my speculation).
For what it is, the AeroPress in today’s market, with the inflation we’ve all seen the past two years is easily a $50 product. That the original can be found all day long for $40, and occasionally for $32 on sale is still one of the greatest deals in specialty coffee.
Missing the cool and useful filter holder? You can still buy the filter holder on its own. It is $14 direct from AeroPress, or there’s 3rd party options with up to 700 paper filters (that’s a 2-3 year supply!) for $15. If you really want the old funnel, AeroPress also sells that for $14. I never used the ones I had.
I remember when people were in wonder of the Illy Transparent Portafilter (circa 1998). Few saw it in person. Everyone can see the brew process in the AeroPress Clear.
If you enjoy and learn from this resource, please consider making a one time or recurring donation to help support our work and fund purchases for future reviews.
I guess the question for many about the AeroPress Clear is this: if you own an AeroPress currently, is this worth spending $50 on (and $10 more than the original AeroPress, still available for the foreseeable future)?
Well, maybe. There’s nothing wrong with the original AeroPress, and it continues to be the iconic brewer it is.
The new Clear version opens up new options for experimentation because you can observe the brew better. If you like to tinker with your AeroPress brew methods, then yes, the Clear should be on your buy list.
If you don’t own an AeroPress, or yours is ancient and you want a refresh, then I do think the AeroPress Clear is a better choice than the AeroPress original, even though it is $10+ more expensive. Again, for all the reasons stated above.
The Clear is made from tougher material. It’s supposedly “hyper dishwasher safe”. More shatter resistant (the older models can shatter from severe impacts – I broke one when I forgot it on the trunk of my car, and I drove away).
The key thing though is the visibility of the brew. If you like tinkering with your AeroPress brews, experimenting with no-bypass brewing, or inverted brews and stirs, or timed drops of gooseneck kettle water from various heights (and want to see the agitation it creates), the Clear model presents new options for observations.
Because of this, we highly recommend the AeroPress Clear. It could open new avenues of brewing methods on the AeroPress, and new recipes for all to share.
If this review was helpful to you, please consider buying the AeroPress Clear via our affiliate link.
If you enjoy and learn from this resource, please consider making a one time or recurring donation to help support our work and fund purchases for future reviews.
The Orb One, a successful kickstarter project, is a new take on the venerable stovetop moka pot brewer. Here’s our Snapshot Review of it.
Our fresh take on the best selling espresso machine on the planet, the Breville Barista Express. Is it still worth buying in 2024?
7 Responses
Excellent review but I think the radial design on the filter cap is the same design that can be seen on APGo?
Being geeky in many different categories I maintain that Mark Prince continues to be the best writer of reviews I know of.
That is an incredibly kind comment, David. Thank you.
All reviewers seem to knock the funnel, but for me it is an essential piece of kit when pressing into narrower cups. The filter holder is essential too, where to put them? That makes this $50 brewer a $78 brewer, which is double the previous price. Seems a bit much to me.
You make a very good argument. At $78, I think it’s getting into the overpriced territory. I was never a fan of the funnel, and other than the first year or so, I’ve not used it at all. Part of it is that I typically use a manual grinder with the AeroPress, and the grinds cups on those are smaller than the AeroPress brew chamber size, so no need.
Hi Mark and thanks for this very detailed review of the latest Aeropress! I do agree that being able to fully see the brew as it progresses is a good enough reason to upgrade to this one if you own a smoke brown version.
One question: have you seen James Hoffmann’s video review of this brewer? He seems very concerned about the manufacturing ‘defect’ he showed on the unit, and how it seemed to affect how he used it. Does yours have this defect as well, and does it cause any problems with usability? You didn’t mention this at all in your review.
Hi Adrian! Thanks for reading and commenting. It’s great getting any kind of feedback on these posts.
It’s funny you should mention Hoff’s video. I watched it shortly before publishing this review, and noted he was going on about the tab / defects on the brewing chamber plastic. I looked at a bunch of the old AeroPresses I have, and they all have the same tabs and smudgy discoloration half circle, except for the most recent smoke grey version. I emailed James at a private email address I have for him, including photos of some of the other Aeropress models showing the same tab. I don’t now if he’s seen the email, but I got no response. Well, he’s a busy guy these days.
You’re not the first person to mention this to me though; maybe I need to add an addendum to this review about those tabs and how it’s been normal on AeroPresses going back to 2005.