For the past few decades now, some of the best espresso and coffee brewed on the planet has taken place not in the world’s top cafes or in barista competitions, but in people’s homes. I say this not with hubris or as a champion for consumer coffee, but as a plain statement of fact that I’ve witnessed from both sides of the equation: as both a cafe employee and a home enthusiast.
There are home coffee and espresso enthusiasts who have invested not only thousands of dollars in equipment, but thousands of hours in time working and refining their home hobby craft in ways that no cafe owner or top shelf barista even has time for. I’m talking about the super-nerd of the coffee world: the home enthusiasts who roast their own coffees, who have count down timers on when the coffee is sufficiently degassed, who measure everything and anything involved in brewing the cup, and who have the absolute luxury of time to work and refine just a single cup. And it is the luxury of time element that distinguishes the advanced home enthusiast from the top shelf pro barista.
But this article isn’t about that. I’m not about to go into the minutia of what an advanced home coffee enthusiast does, but instead, just talk about the time proven results all of their hard work and effort into their hobby has shown when it comes to what improves home coffee, and what does not.
More than ever, the four “M”s of good espresso (and good coffee) stand true today as they did decades ago when Italians coined the phrase. The 4 “M”s are Macchina (the machine), Macinazione (the grinder), Miscela (the blend, or coffee bean used) and of course, Mano, or the person making the beverage. But I’d add a fifth, and it doesn’t start with M. It would be Acqua, or Water. So let’s call the new rule the Four “M”s and an “A”.
Are each of these five things equal in importance? In the past, perhaps yes, but espresso (and coffee brewing) technology has advanced so much in the past few decades that the machine element is pretty much set pat; you can brew a fantastic shot of espresso with a $250 espresso machine these days, and you can brew amazing coffee with a $15 pourover device.
I’d argue that Mano — the human element of making coffee — remains the single most important part. There’s a trend these days to rely more on technology to absolve the human interaction element (letting machine readouts and test results tell you a coffee cup is good, instead of your taste buds), but nothing — absolutely nothing — can beat an experienced coffee person at not only detecting the nuances, pluses and minuses of a brewed cup, then using your gained knowledge to improve the next brew. And I say this as someone who has lots of technology to make my coffee better in the home, from a TDS meter and two Fluke thermometers, to some seriously expensive scales.
All that said, I’m not writing an article about improving your coffee mastery skills (I’ll save that for another time); I want to actually talk about the tools you can use to make better coffee, without going complete geeknerd-out on extreme tech. Let’s delve into those now!
The Water
The water you use in brewing coffee is a crucial element in getting a great cup of espresso, brewed drip coffee, a siphon brew, a press pot, you name it. It is not the single most important element (more on that below) but one you should not discount.
My first water tip is this: You can dramatically improve the taste of your coffee by doing one thing: buy a water filter system. You can go with the ever-popular Brita Water Filter System, or the one I prefer using, a PUR 18 cup system, or any others you prefer. But buy one: depending on where you live and what your local water quality is out of the tap, it could be an even greater game changer than any of the other elements discussed below.
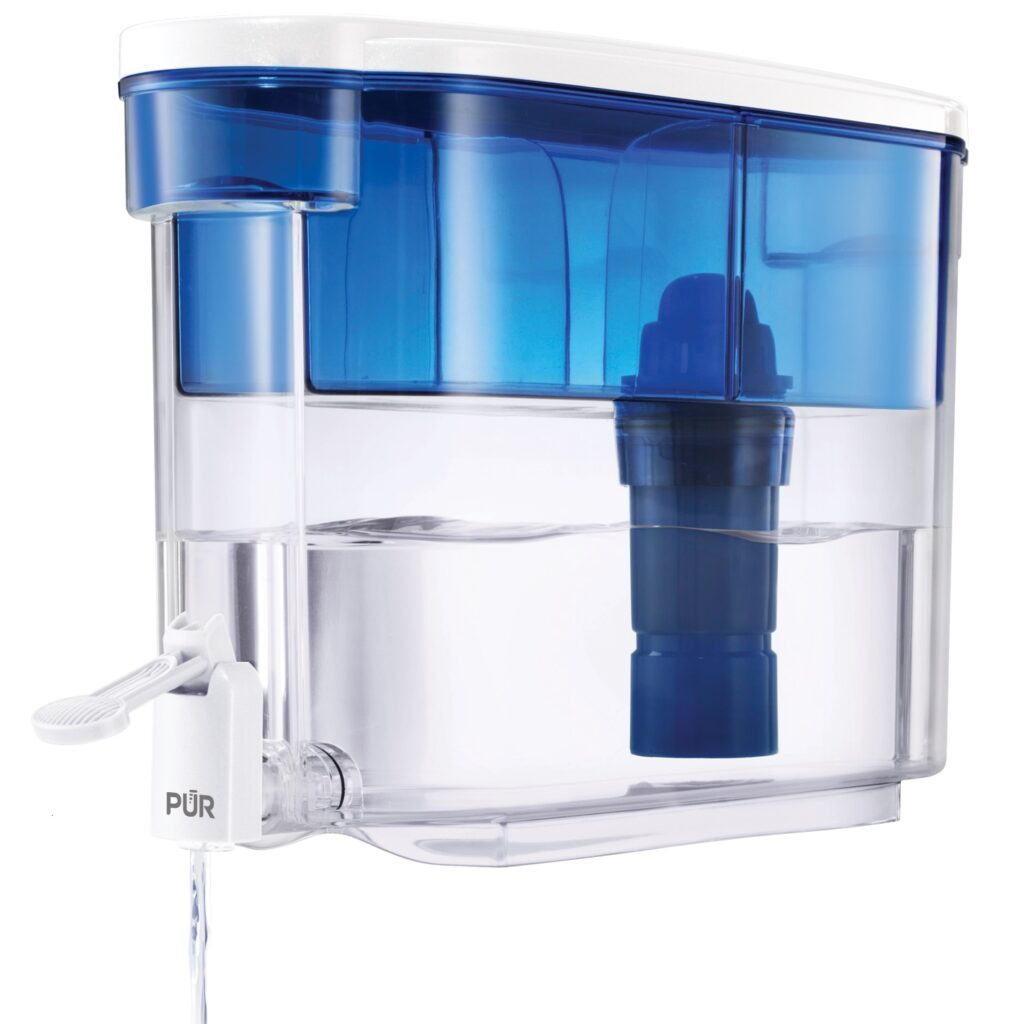
I live in Montreal, Quebec, which has very questionable water quality (link’s in French, here’s the translated version), and even though the city does heavy filtration, I make sure every single ounce of water that gets turned into coffee in my house is filtered. For several years, I lived in Vancouver, which is considered to have some of the best tap water in all of Canada, if not all of North America; Vancouver’s water supply has a very neutral pH level and is very soft with low (way below standards) chlorine levels, low levels of minerals, and 0.001% (<) heavy metals or other foreign contaminates. But I still filtered water when I lived there, for coffee and espresso use, in order to flush out any remaining chlorine or natural fluoride. I can tell the difference in the cup too; when I was too lazy to run Vancouver water through our PUR filter, and just go ahead and brew with tap water, there is a slight change in the coffee’s taste that is not always for the better. In Montreal, I never, ever make coffee with unfiltered water.
You should consider this tip a “must do” if you want your coffee and espresso quality to improve, perhaps even dramatically depending on where you live.
The second water tip is to avoid doing something I have been guilty of in the past and have seen many other people do: never reboil water. Always use fresh water. If you’re in the habit of topping off your water kettle each time you want to do a pourover coffee, stop that. Pour all the water out, and start 100% fresh. Boiling drives elements out of water that you want in coffee. Boiling makes water sterile and distilled. Believe it or not, some minerals in your water are a good thing for brewing coffee. Always use fresh water.
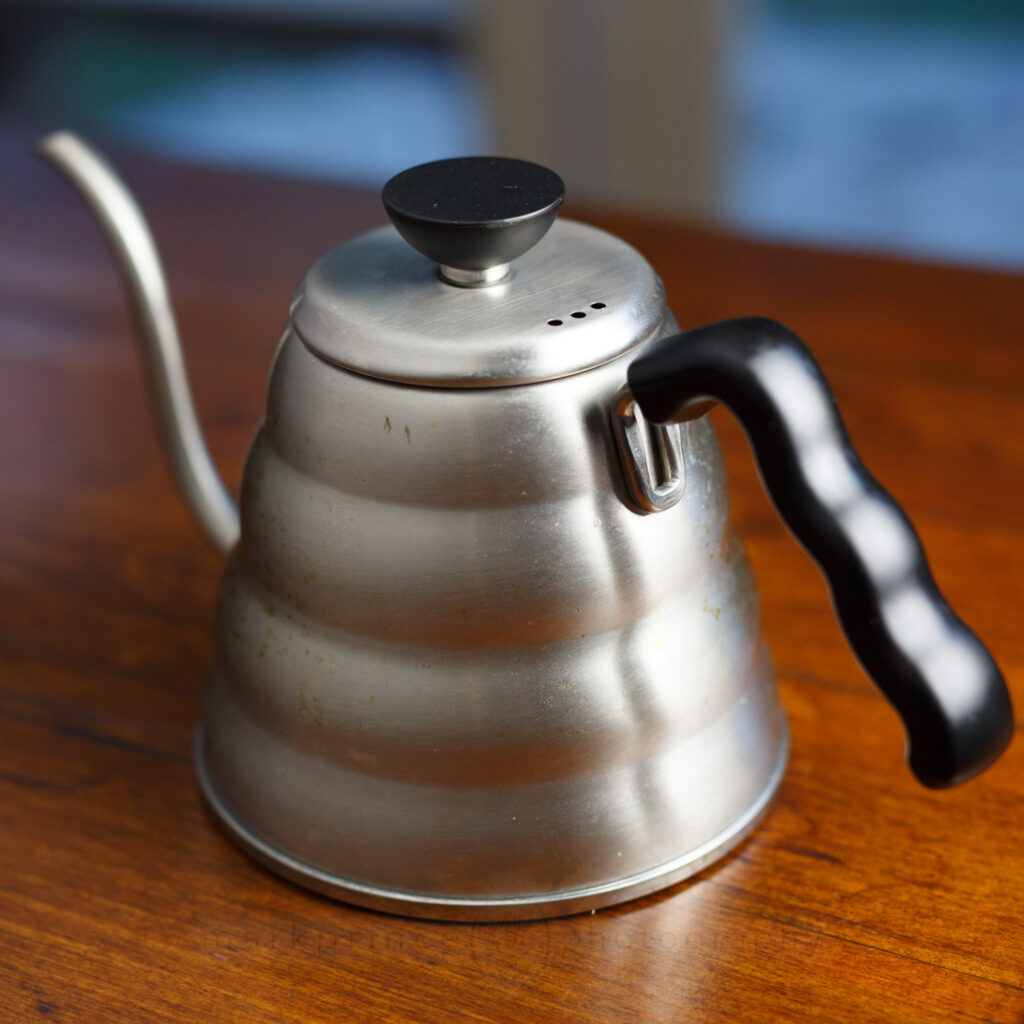
The third “pro-tip” is to actually pour water at the proper temperatures when you’re doing pour over or press pot coffees. Fresh off a rolling boil, when water is still at around 98, 99C (around 208-210F) can actually damage coffee extracting more bitters and undesired elements that you won’t want coming out of the extraction.
Sure, the arc of just-off-the-boil water through the air as it moves from kettle to your brewing vessel will cool it down somewhat, but it’s better to have the water’s temperature at around 95-96C max in the kettle (204-208F), and pour close to the brewing vessel, to minimize temperature loss. This way, you’re controlling a variable more closely and by doing so, have a better chance of improving your coffee’s cup quality.
Chris Baca did a great water tutorial video back when he was with Verve Coffee on this subject – definitely worth a watch! (ed.note: unfortunately, Verve Roasters deleted the video from Vimeo recently).
Water is one of the easiest and most economical ways for you to increase the quality of your coffee and espresso; I hope you’ll find this to be true by following the above tips.
Using Scales in Coffee
So, earlier on I promised not to completely geek nerd you out on extreme equipment for brewing coffee and espresso… and promoting the use of scales might seem just that. Ten or twenty years ago no one used scales for brewing coffee, right? Well, actually home enthusiasts did, but they were limited to using cheaper kitchen type scales that only were only accurate to within 1 or 2 grams. Now you can get dedicated coffee scales like the Acaia Pearl ($140USD!) or the super expensive Acaia Lunar Espresso Scale ($240!). Both are incredible scales, but both are also serious overkill for all but the most intense home barista enthusiast.
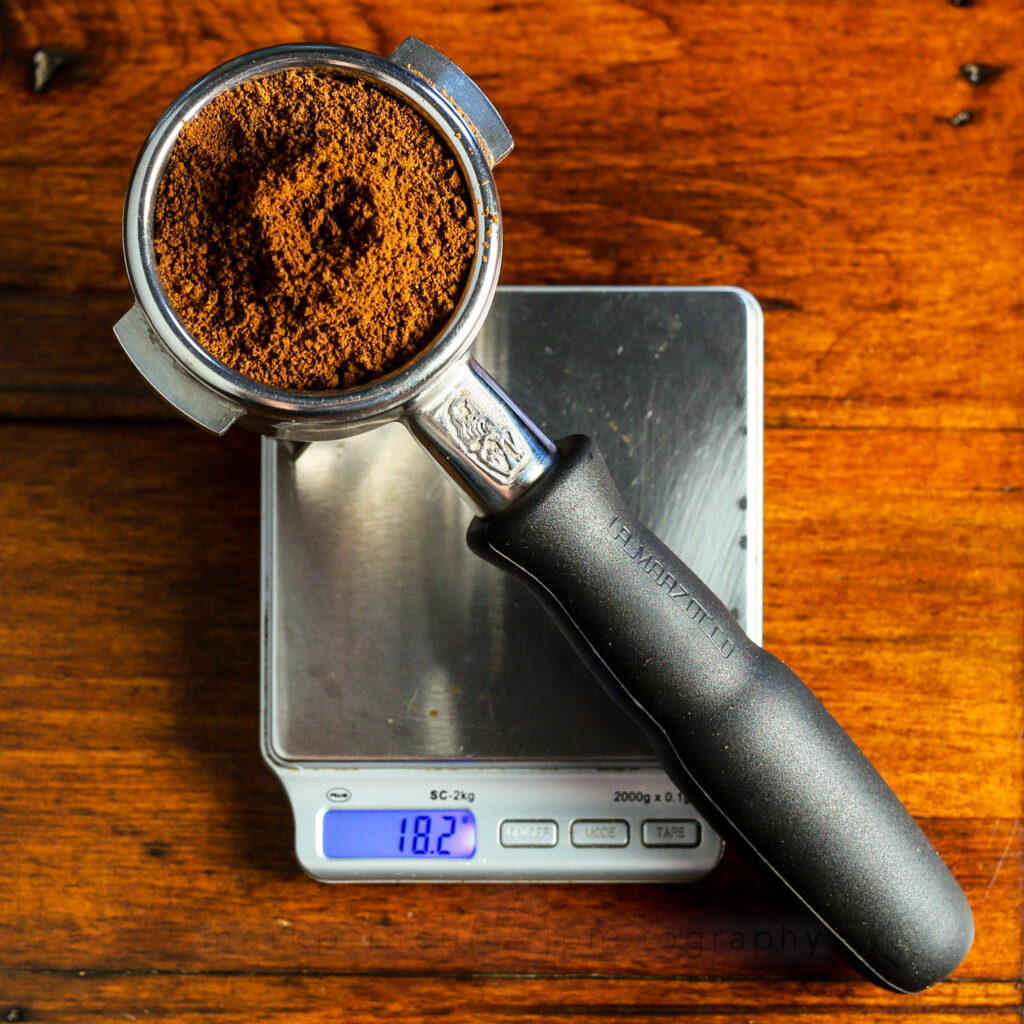
Instead I recommend a scale that I first found right here on this website, over 10 years ago: the American Weigh AMW-SC-2KG Scale ($22USD) which is feature packed, with a .1g accuracy level and 2kg weight limit, you can even use it to weigh a portafilter with coffee in it (though you have to put a stiff board across it to fit the portafilter, as this scale is small). One caveat: this scale is not waterproof — at all — and it seems most of the times it fails it’s because of liquids. Buy a couple, and treat it kind.

Crazy expensive, but the most advanced espresso scale available today. Bluetooth built in, water resistant, fast, accurate and auto-modes. Too bad it’s Android support is really bad (mainly works with iOS).
A longstanding favourite for home espresso and coffee nerds, the SC-2KG is cheap, fast, and accurate to .1g with a 2000g limit.
Now… why a scale? The answer is for consistency, but also for troubleshooting bad shots of espresso or underwhelming cups of coffee. Back in the bad old days, we used to say “one rounded tablespoon of ground coffee per cup”. But what was a cup? The standard 8 liquid ounces? Heck nope, it was 6 ounces… or 4 ounces… or 5 ounces… depending on which coffee machine manufacturer you spoke to, or which roaster you asked. And what’s a “rounded tablespoon”? Just for shits and giggles, I did 2 rounded tablespoons of coffee, three different times using 3 different grind levels. Each time, I was off by as much as 1.5 grams in coffee weight. And a rounded tablespoon of espresso grind weighs more than a rounded tablespoon of press pot grind.
A scale takes the guesswork out, both of your weighed coffee and your volume of water used to brew coffee. It may not seem much… you may be thinking “well if I’m 5 grams off on the dose when brewing a litre of coffee, what difference does that make?” and you’d be right – if you’re brewing a litre, or 1.5 litres of coffee, using 5 or 10 more grams or less won’t have a huge taste impact. But the smaller volumes you go, the more your coffee to water ratio becomes important. Brewing 300mls in a Hario pourover? You want your coffee dose as close to 21g as possible. Brewing 200mls in an Aeropress? You want to be within a gram of your ideal ratio weight. Brewing espresso? .5 grams can make a big difference in the shot quality.
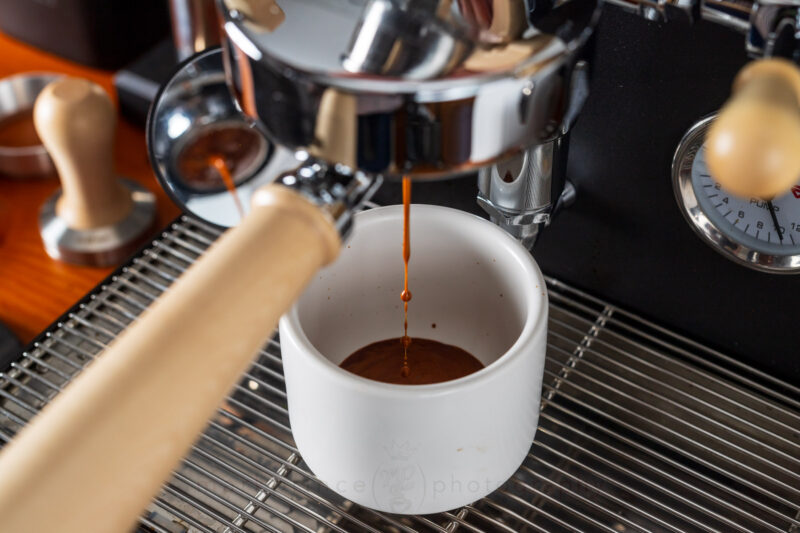
Using Scales in Espresso. Espresso is where the use of scales has the most benefit in terms of cup quality and consistency. Espresso is the most demanding brewing method for coffee that we know of today. It demands a lot, and delivers a lot. Scales are used three ways in espresso: measuring dose, measuring brew volume, and for troubleshooting.
Use a scale to measure your dosed, ground coffee so that you’re within .1g of your target weight each and every time. If you decide you want to pull a double using 18.5g of coffee, a scale takes that guesswork entirely out of play. If you want to see how a double using 20g of coffee works, a scale helps you with that. You can measure your dose one of two ways: either grind coffee into a cup that you’ve zero’ed out the weight of on your scale, then pour that coffee into the portafilter, or put your portafilter on the scale, zero it out, then grind directly into the portafilter, taking your weight measurement of both after.
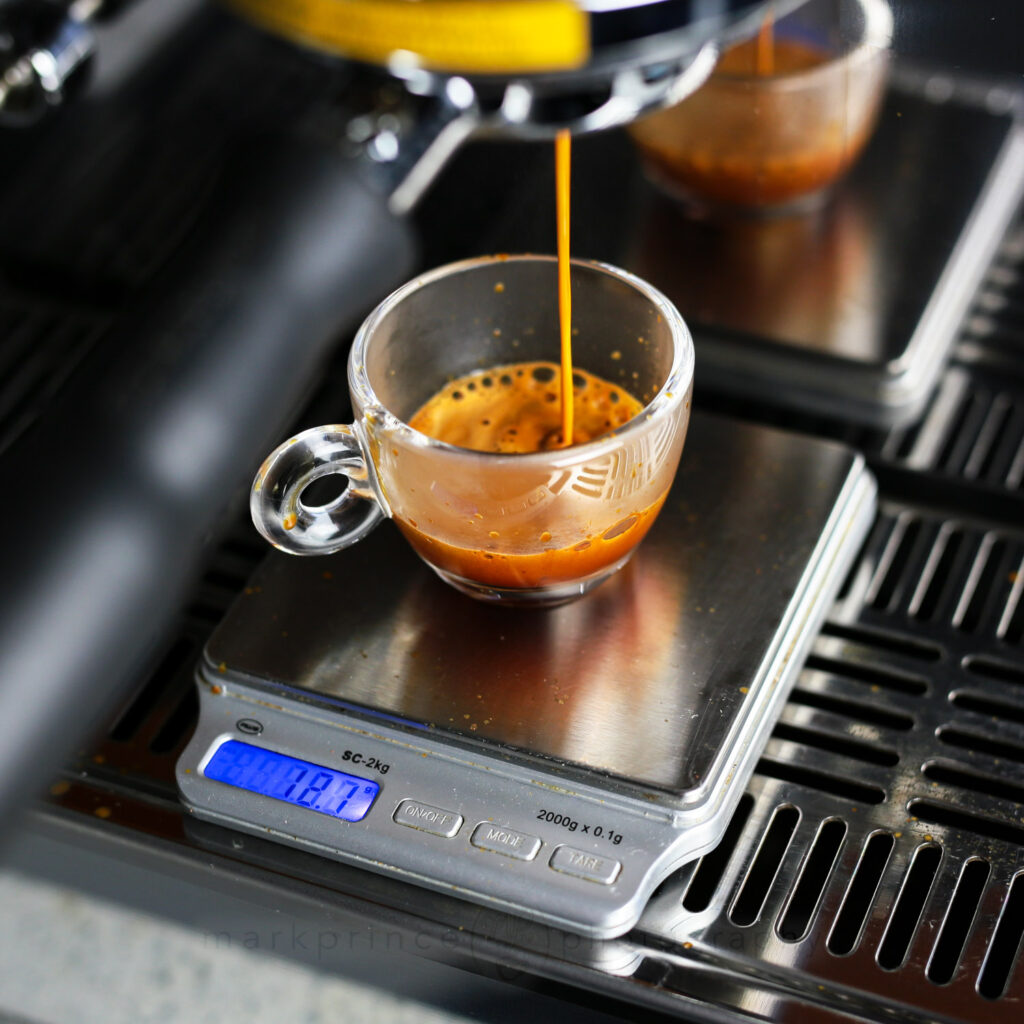
We also use scales to measure brewed espresso volume. Why not just rely on the visual height of the beverage in the cup? Because of crema. Crema can be very thick, and what looks like a 30ml, or 45ml, or 60ml shot might actually be a lot less. Using a scale again takes all the guesswork out of this. This is especially important if you’re trying to get within proven good ratios for espresso: the 40%-60% range. What is that? It means that the dry weight of your ground coffee should be within 40 to 60% of the finished beverage weight of your shot. So if you’re using 18g of coffee, you want to have around 36g of brewed espresso. A 0.1g scale helps you achieve that, again, taking all the guesswork out.
Then there’s troubleshooting. Say you start with the idea that you want an espresso to taste great at 40ml, using 18.5g of coffee. You pull shot after shot, and it’s not quite there. Maybe you can adjust the temperature of your espresso machine, so you play with that. Maybe you can preinfuse longer, so you play with that too. If none of these things work, your next plays are to change your brewing time by changing either your grind fineness or your dosed weight, or both. Or you could decide to just brew 30ml or 35ml, based on what you’re tasting in the cup. To do most of these things, you need an accurate scale to help the job of troubleshooting along.
Lastly on espresso, the use of a scale lets you experiment with tasting espresso and seeing where its sweet spots lie. You could use a scale to set up three nearly identical shots — let’s say all with using 18g of coffee, and trying to pack and tamp them each the same way — then pull those three double shots, but stop one at 30ml, one at 35ml, and one at 40ml. Taste the three examples, and take notes. Which were better, which were worse? And why? Did the “worse” shots still have some benefits over the “good” shots? All of this helps improve your “Mano” part of the 4 “M”s (and an “A”), where you learn from experience and trial and error about what makes an espresso shot better (or worse). A scale helps you do that accurately and, dare I say it, scientifically!
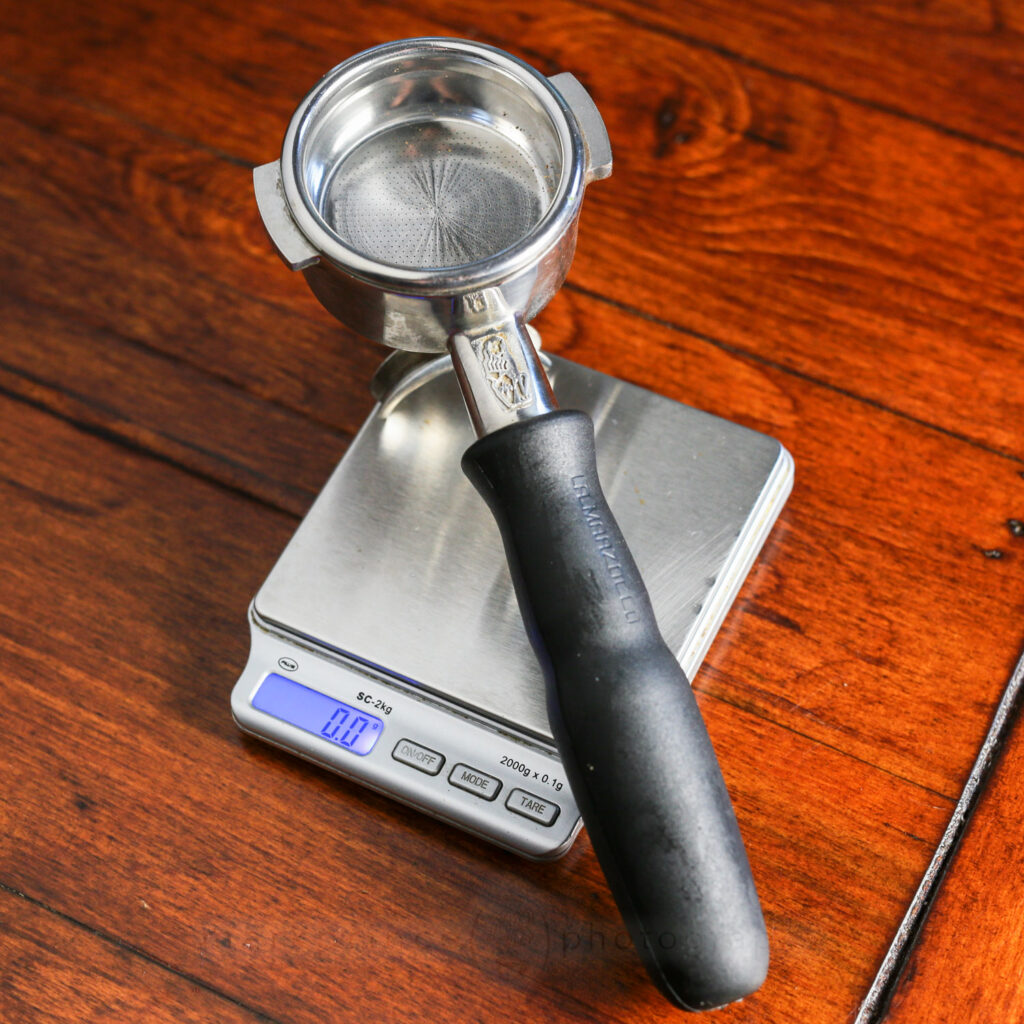
While a delicate balance, it can be done! You can use the SC-2KG scale with a portafilter
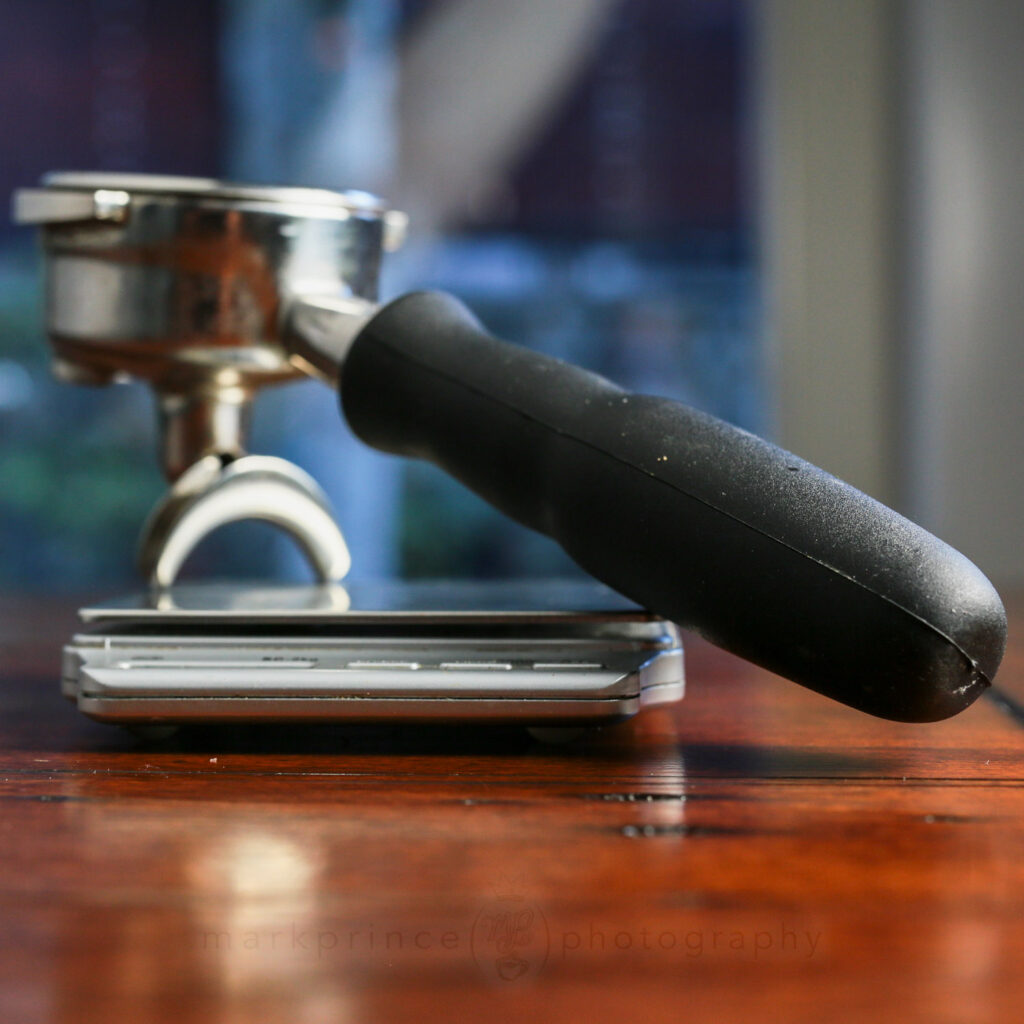
Using the corners of the scale, you can balance the portafilter so it’s entirely resting on the scale. Alternatively, put a piece of stiff material across the scale and put the portafilter on top of that.
You can then use the portafilter directly to measure your dose of coffee.
Using Scales for other Coffee Brewing Methods. Scales are also very important for other brewing methods, but become less important the higher volumes you brew (though you should still use a scale). The “golden ratio” for coffee to brewing water is 7 grams per 100 milliliters of water used, but it’s not a hard wired rule: think of it as a starting point. Again, you can use scales to measure your dose, measure your brew water volume, and to troubleshoot, using similar methodologies to the espresso ones I laid out above.
For non-espresso brewing methods, a larger scale might be more convenient, and here, you could possibly do away with .1g accuracy as well. I use the AMIR 5000g scale which is ridiculously inexpensive at $10, for brewing in press pots, with my Hario pourover, and my Toddy brewer. These kinds of scale allow you to easily place larger brewing devices right on them to get accurate measurements of brewing water volumes. I do have a tip though: put a piece of non-slip silicone or other insulating material between the scale and your brewer of choice: heat affects the accuracy of these scales.
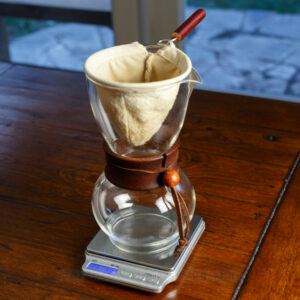
You can weigh the coffee directly this way (zero’ing out the weight of the pourover device), and also weigh the water you add while brewing. A tip: use an insulator between the pourover and the scale, as heat can change the weight readings.
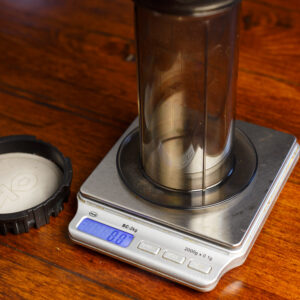
You can easily brew with an Aeropress (using the inverted brewing method) on a scale. Just don’t plunge the Aeropress while it’s on the scale, you’ll damage the scale’s sensors!
And lastly on scales, a pro tip for all you Americans out there. Start thinking metric when making coffee. Why? Water, when seen by metric is a neat thing: 1 gram of water = 1 milliliter of water (that’s how metric was designed) so when you weigh water and see it’s 500 grams, you know you have 500mls of water. You don’t have to pull out a converter just to figure out ounces vs fluid ounces, etc. Go Metric!
My next article will feature two more categories on where you can improve your home coffee game, and one of them in particular is a doozy – possibly the number one thing you can do to dramatically improve your home coffee experience. Stay tuned!
(Looking for Part 2? Check it out here!)