Guides ◦ How Tos

The world's most read coffee and espresso resource

Weiss Distribution Technique

A quick and easy way to improve your espresso, and you can do it with just a paper clip. Pro tools make it even easier.
Share this How To

IntroductionWeiss Distribution Technique

For coffeegeeks, the quest for a more perfect espresso is an eternal pursuit. Brewing the ideal shot demands a meticulous balance of variables, including grind size, tamping pressure, and distribution. Among these, the Weiss Distribution Technique (WDT) has emerged as a game-changer, revolutionizing the world of espresso preparation. In this How To, we will explore the ins and outs of this technique and how it can elevate your espresso-making prowess.

Understanding the Weiss Distribution Technique

Developed by John Weiss (from the now defunct alt.coffee group) back in the early 2000s, the Weiss Distribution Technique is a method of distributing coffee grounds evenly in the portafilter before tamping. Its primary goals are to eliminate inconsistencies in the coffee bed, removing clumps, and redistributing the ground coffee more evenly, ensuring uniformity in extraction and, consequently, enhancing the flavor profile of the final espresso shot.

The WDT process involves using a distribution tool to gently stir the coffee grounds in the portafilter basket. Weiss used a dissection needle in his first attempts; others used sewing needles, paperclips and even thin toothpicks. Most recently, manufacturers are making WDT devices and commonly use acupuncture needles, set into wood or plastic, as the stirring mechanisms. When I was learning, I made my own homebrew devices, and blogged about it here.

Using a paper clip to do the WDT technique.
Doing the WDT with a paper clip.

By stirring the bed of loose, ground coffee, clumps and uneven densities are broken up, leading to a more homogenous coffee bed. This uniform bed promotes uniform water flow during the extraction process, preventing channeling and reducing the risk of over-extraction or under-extraction.

For this How To, we’re using the following coffee and equipment:

  • Introvert WDT Tool: IntrovertMakes sells different WDT Tools on Etsy, including a very high end aluminum one; I’m using their Classic Model (just $16!) for this tutorial. Ships from Canada.
  • Dosing Collar: A dosing collar is a must if you want to apply the WDT method quickly. You can make one out of a single-serve yoghurt cup (cut the bottom off, fit to your portafilter), or buy this really nice one from Amazon.
  • Espresso Machine: natch! I am using my trusty tried and true Breville Dual Boiler, which I think is the best darned espresso machine in the world, dollar for dollar.
  • Coffee Grinder: Of course, you need a great coffee grinder for good espresso. I just got a Timemore Chestnut C3 model, but for this demonstration, I’m using my well used and loved Baratza Vario grinder.
Gear and Coffee Used
Subscribe Today
COFFEEGEEKNEWSLETTER
Sign up for the twice-monthly Coffee Pulse Newsletter from CoffeeGeek, with original, exclusive content, prize giveaways, and updates on the newest website content.
Newsletter Signup

Subscribe to
Coffee Pulse

Delivered twice monthly, CoffeeGeek's premier newsletter dives into a specific coffee topic each issue. The Pulse also occasionally features contests and giveaways. Subscribing is free, and your personal information is never shared.


By submitting this form, you are consenting to receive marketing emails from: CoffeeGeek. You can revoke your consent to receive emails at any time by using the SafeUnsubscribe® link, found at the bottom of every email. Emails are serviced by Constant Contact
RANCILIO SILVIA PRO X
redefining a classic
dual boilers, pid, preinfusion and more

Get it at
1st in Coffee

CoffeeGeek's
preferred
vendor for
all things
Rancilio

Step by StepGuide

How to do the Weiss Distribution Technique for Espresso

Whether you are a home barista, or a cafe barista looking to improve their shot quality, the WDT method can and will help. Once you get practiced with the technique, it can be relatively quick, adding only about 15-25 seconds to your shot pulling process. Here’s some steps and guidance.

MainPhotoWDT-2.jpg

Equipment Cost $ 35

Necessary Supplies

Fresh Roasted Coffee
Filtered Water

Necessary Tools

WDT Tool ($15)
Dosing Collar ($20)
Espresso Machine
Coffee Grinder
Tamper
Scale (optional - for weighing coffee)

Weiss Distribution Technique Steps

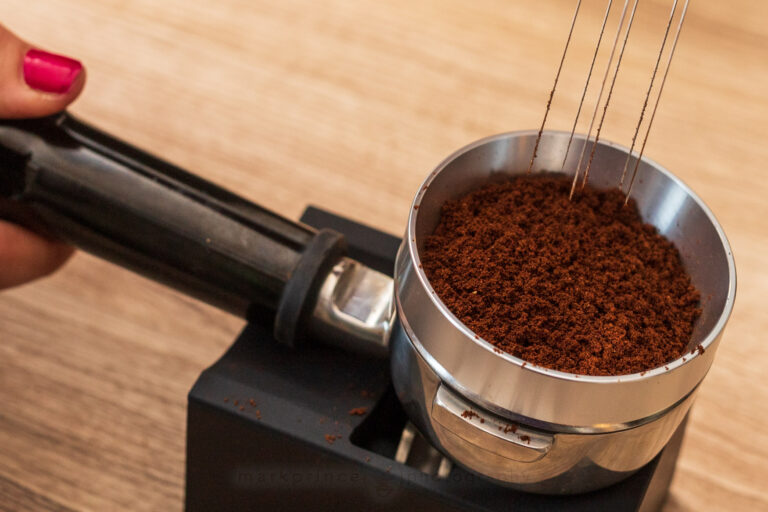
Choose the Right Distribution Tool

While you can do the WDT with a toothpick, sewing needle or even a paperclip, having a proper tool for the method really makes it easier, better, and quicker to perform. Opt for a tool where the needles are more widely spaced than close together. I am using the excellent Classic WDT Tool from IntrovertMakes, and it does a wonderful job.
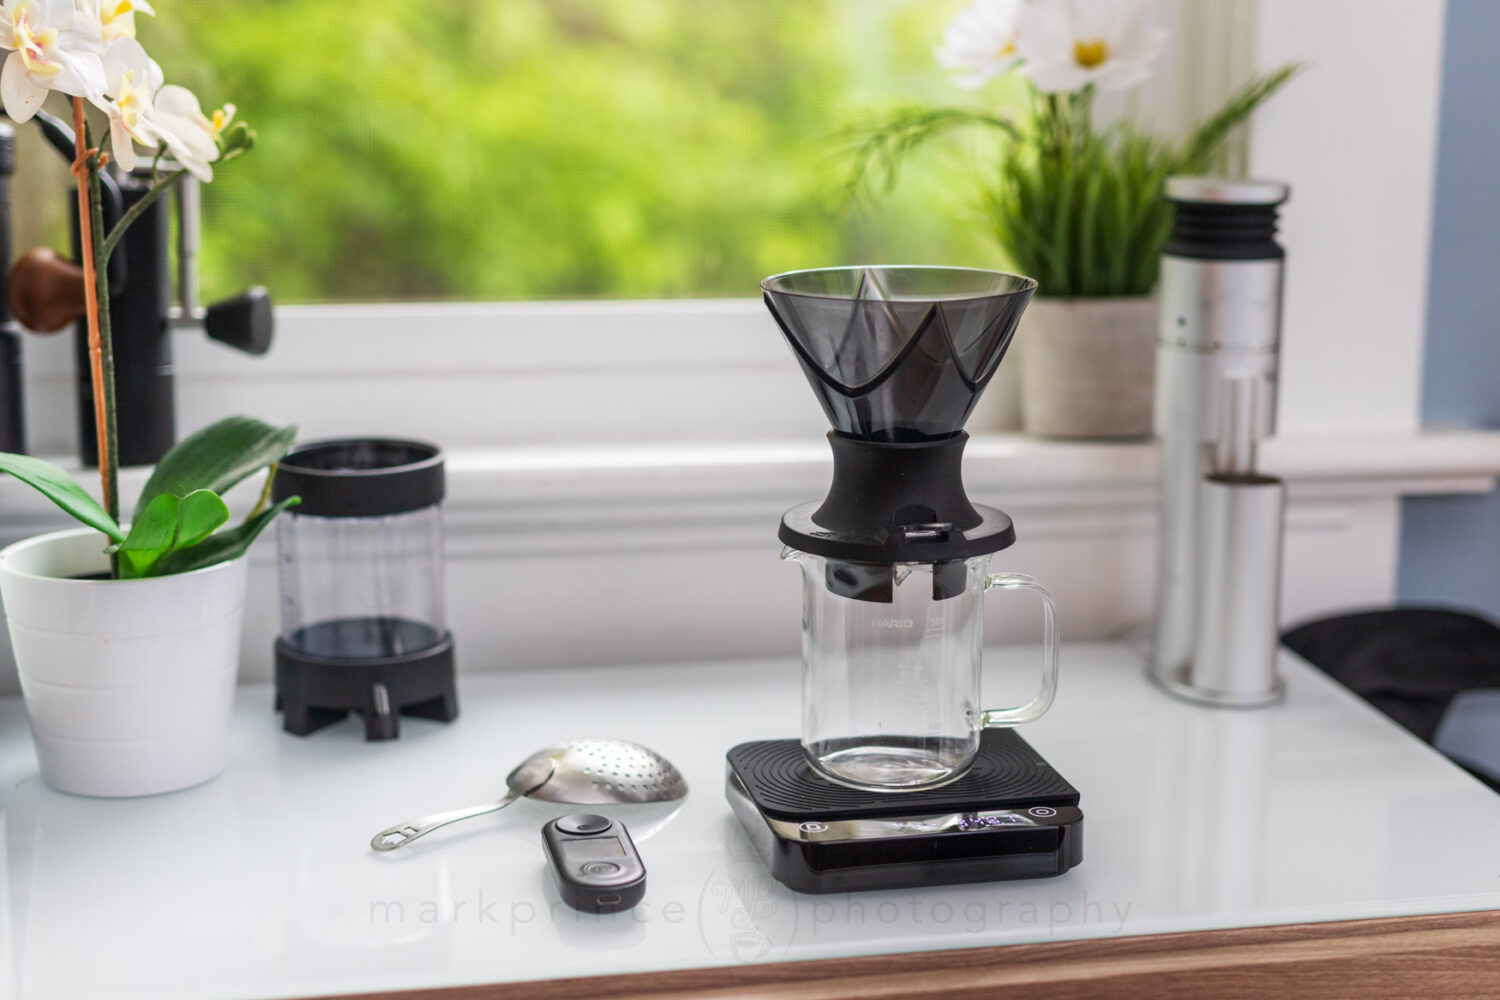
WDT_Steps-1.jpg

Use a Dosing Collar

A dosing collar of some sorts is absolutely required to do a fast, even and mess free WDT application. With a dosing collar, you can be more “aggressive” in the early stages of your WDT method, in order to better redistribute coffee and break up excessive clumps. Without one, applying WDT without making a mess can take 3x or more extra time. You can make one out of a solo yoghurt container (cut the bottom off), or buy a nice one like the one I’m using, from Amazon.

WDT_Steps-2.jpg

Grind and Dose

Grind your coffee to the right espresso grind setting immediately before you want to make your shot. Timing is of essence here, because the longer espresso grinds are exposed to air, the less CO2 they have to help you make great coffee. Since the WDT method adds time to your prep, grind your coffee after you have your other tools ready to go. Once ground, pour the coffee into your portafilter with the dosing collar attached.

WDT_Steps-3.jpg

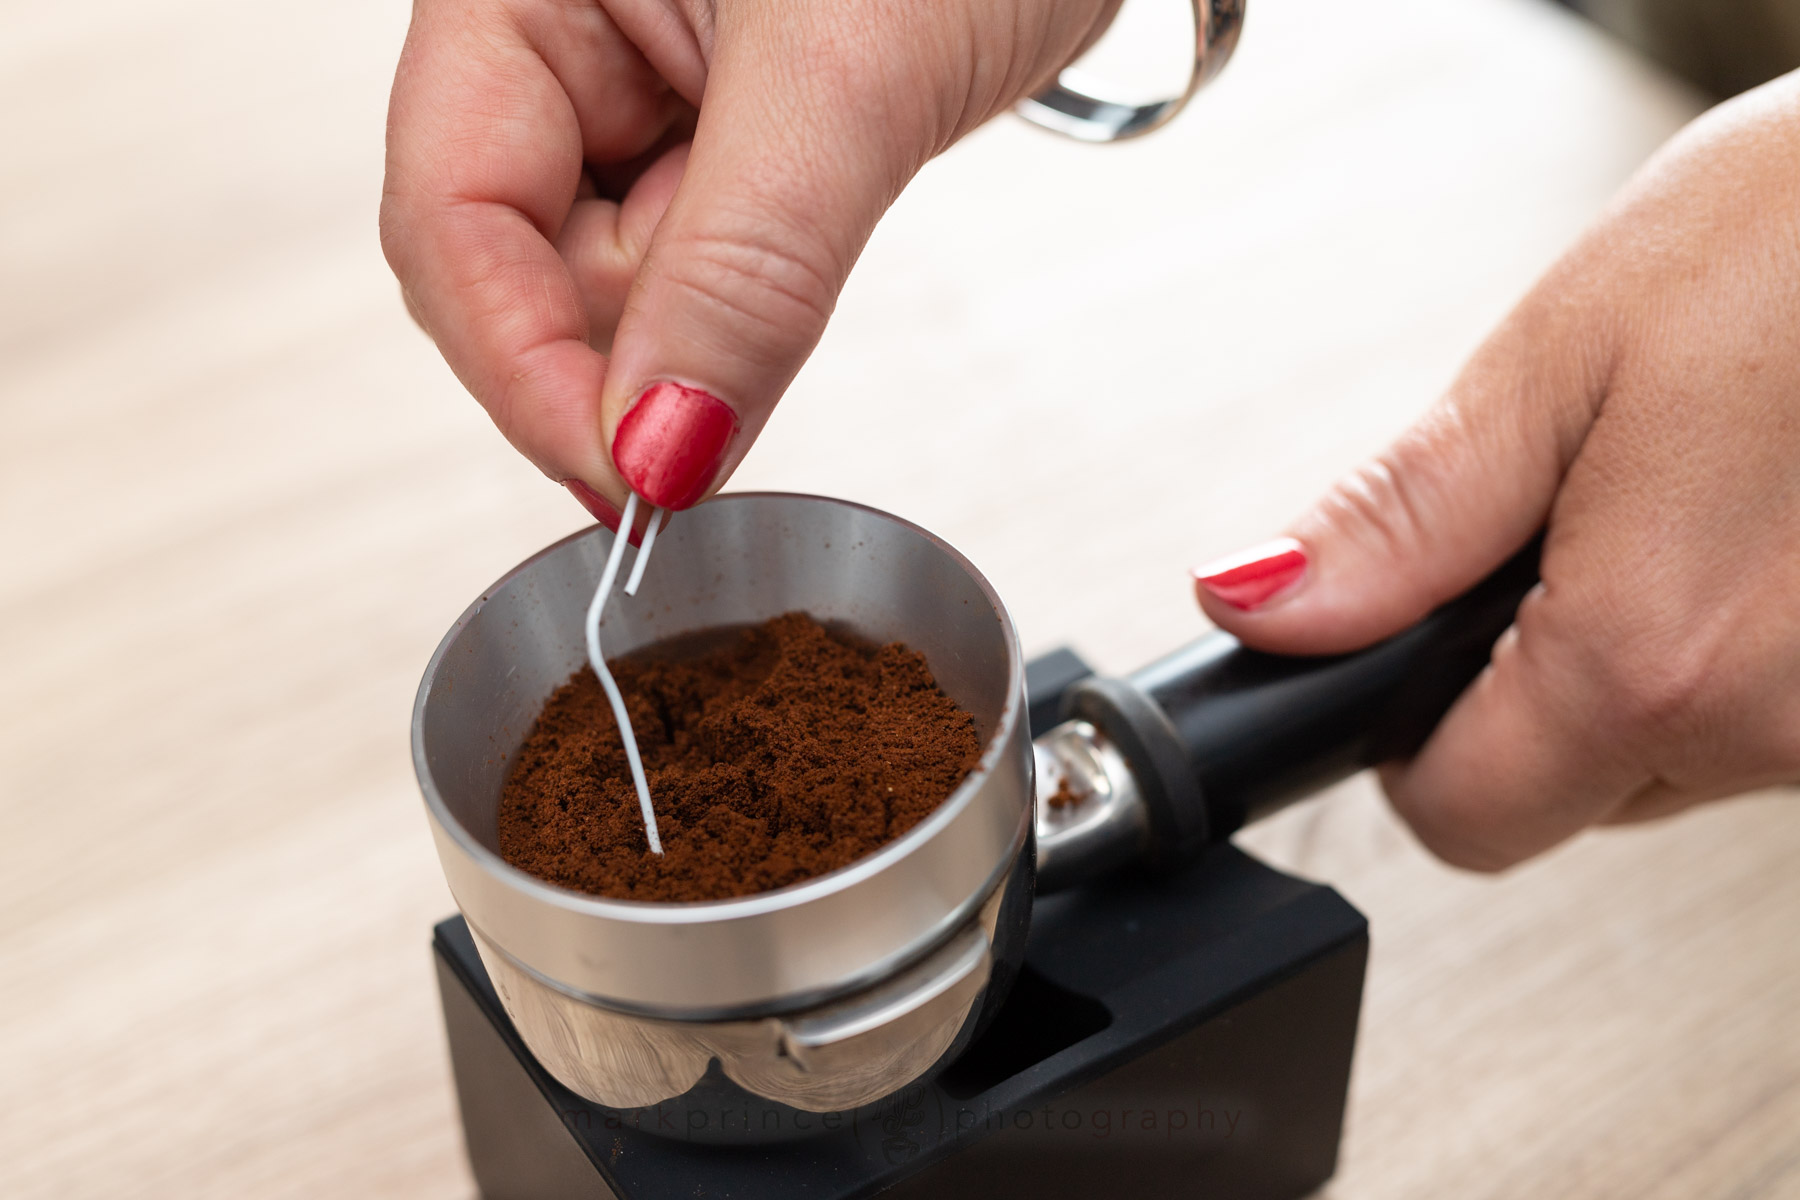
Apply the WDT Distribution

After dosing the coffee grounds into the portafilter, use the distribution tool to gently stir the grounds. Move the tool around in a circular or back-and-forth motion, ensuring that all clumps are broken up, and the grounds are spread evenly. Ensure the needles are as close to the bottom of the filter basket without actually touching it. This comes with practice. Try to complete this in under 20 seconds.

WDT_Steps-20.jpg

Knock Down (Optional)

Once distributed with the WDT tool, your bed of coffee should be nicely fluffy and even across the filter basket. Some like to “knock down” the bed of coffee at this point by very evenly knocking the portafilter down onto a tamping mat, to compact and lower the bed in an even way. This is optional, but experiment both with and without to see what benefits you get in your shot.

WDT_Steps-8.jpg

Tamp as Usual

With your nicely distributed, fluffy (or knocked down) coffee grounds ready to go, proceed with tamping as you would in your regular espresso preparation routine. Applying consistent, level, and adequate pressure during tamping is essential to achieve the best results. If you use a leveler, use that first.

WDT_Steps-9.jpg

Pull the Espresso Shot

Insert the portafilter into your machine and pull that shot of espresso using your normal method.

WDT_Steps-11.jpg

Observe and Adjust

As you experiment with the Weiss Distribution Technique, pay close attention to the results. Analyze the taste, appearance, and aroma of the espresso shots. Fine-tune your technique as necessary to optimize your espresso-making process. Learn, and have fun!

WDT_Steps-10.jpg

Benefitsof the Weiss Distribution Technique

The number one benefit of doing the WDT method when preparing your espresso is, you’ll get better tasting espresso. I mean, isn’t that good enough? But wait, there are more specific benefits, too.

  • Enhanced Flavor Clarity:

    By ensuring a consistent coffee bed, the WDT allows for a more even extraction of flavors from the coffee grounds. This results in improved clarity and definition of flavor notes, bringing out the full potential of the coffee beans.

  • Increased Consistency

    The WDT minimizes the impact of human error in the espresso-making process. Baristas often face challenges in achieving consistency across multiple shots, but the WDT significantly mitigates these variations, leading to more predictable and repeatable results.

  • Reduction in Channeling

    Channeling, which occurs when water finds paths of least resistance through the coffee bed during extraction, can result in uneven extraction and a subpar espresso shot. The WDT minimizes the risk of channeling by creating a uniform bed that allows water to pass through evenly.

  • Better Crema Formation

    The even extraction brought about by the WDT leads to improved crema formation, the rich golden-brown layer that sits atop a well-pulled espresso shot. A thicker, more robust crema is often an indicator of a well-balanced and flavorful shot.

WDTConclusion

The Weiss Distribution Technique has become a game-changer in the pursuit of home espresso perfection. It does add up to 60 seconds to prep time, especially if you don’t have a dosing collar, and this is one reason why so many cafes have not adopted it, but I feel they should. A well practiced WDT technique should only add about 30 seconds (or less) to your shot prep time, and the results in the cup are definitely worth it.

By promoting even extraction and enhancing flavor clarity, this method empowers baristas and home enthusiasts alike to elevate their espresso-making skills. Implementing the WDT requires a bit of practice and experimentation, but the rewards are well worth the effort. If you haven’t tried WDT yet, give it a shot: all you need is an unfolded paperclip to try it out, as I did in my introduction post to this preparation method.

Happy brewing!

Connect with us on Social Media

Support CoffeeGeek

If you enjoy and learn from this resource, please consider making a one time or recurring donation to help support our work and fund purchases for future reviews.

Donate
donate via Paypal
Revisions to this How To Guide

This is the first version of this How To guide.

if you liked this how to, please consider
sharing it on one of these platforms; it helps us greatly!
How To Use a Hario V60 Pour Over
March 25, 2024

CoffeeGeek’s in depth how to on the Hario V60 brewing system, with its patented ribbed filter holder and conical filters. Updated for 2024.

Read the Review
Best Budget Coffee Grinders for 2024
April 16, 2024

Looking for a coffee grinder on a budget? Check out our fully tested and reviewed best of the best coffee grinders offering great value.

Read the Review
The companies that make this website possible

CoffeeGeekSponsors